
If i could give you every bit of advice in one go, i would, but this would mean a hugely cumbersome document which no one would ever, ever read fully.
I have arrived at this first few tips because of personal experience and making the occasional mistake. I always think of a quote when i do that and it helps me move forward in my thinking and that is
“While one person hesitates because he feels inferior, the other is busy making mistakes and becoming superior.”
Make the mistakes, learn from them, but if someone is there giving you advice, for free and wanting to make the difference between a good nights shooting and a great learning experience, listen and absorb that information.
Now the heavy philosophical stuff is out the way, on to the pretty straightforward tips.
1. Scout your location in the daytime if possible.
Always have a look at the location your thinking about shooting in the day. Understand the obstacles, ground conditions, tide times, access availability, parking and more…
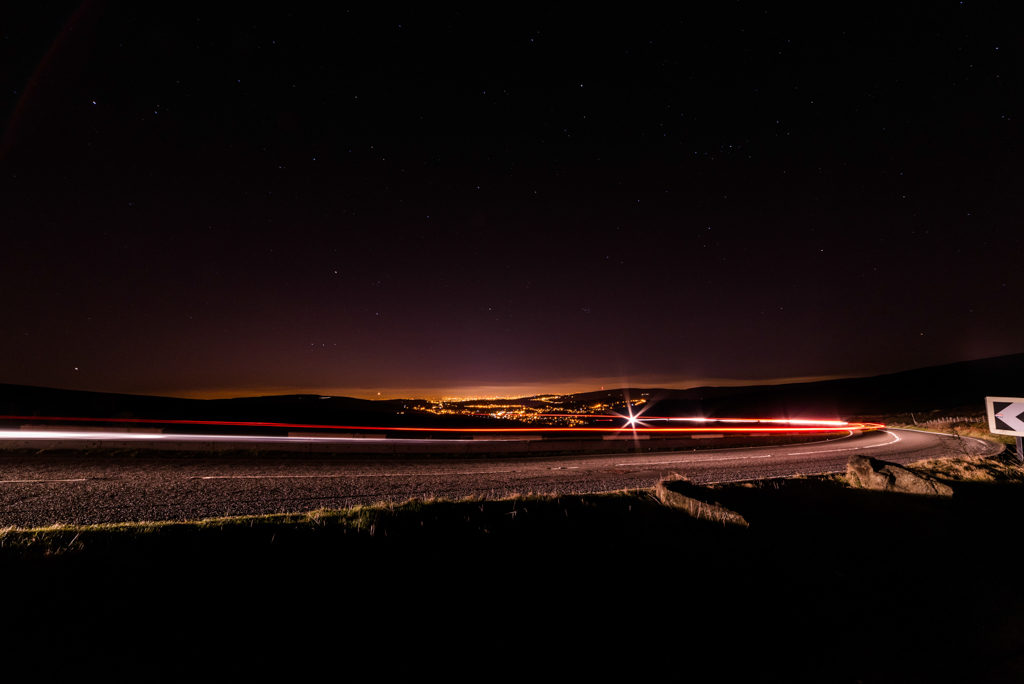
For instance taking this shot i checked out the location in the day before.
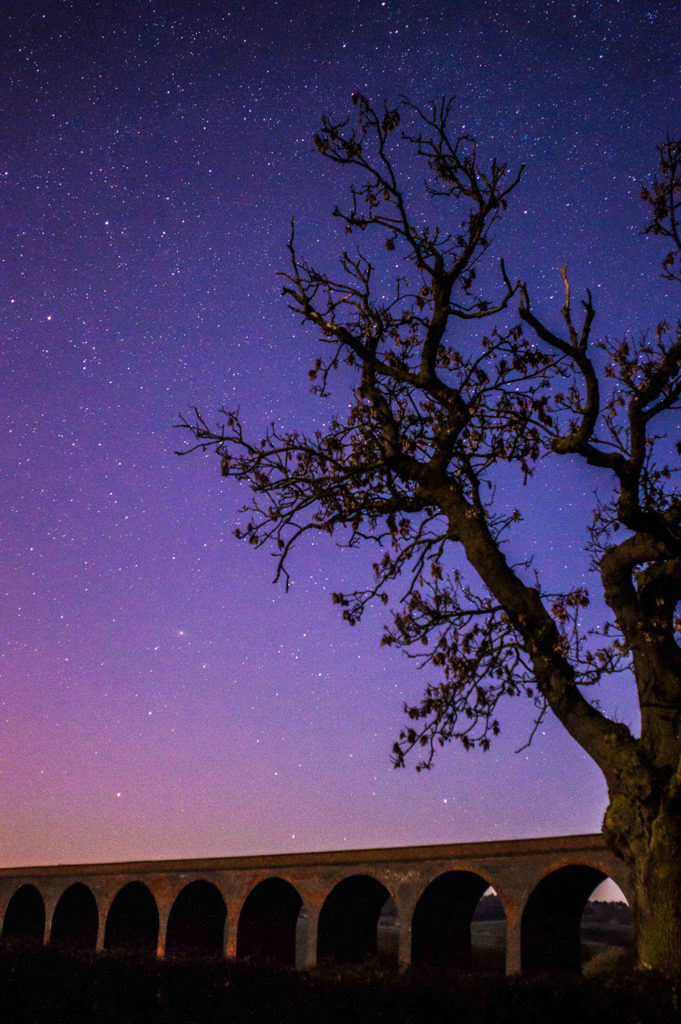
I understood the ground was a quagmire of mud, so took the appropriate footwear and some extra support for the base of the tripod, knowing it could sink, even slightly.
Checked that parking is available on the side of the road, and that the shot would be from a public path.
There may be obstacles you cannot foresee, but be as prepared as possible.
2. Arrive at the location early.
Turn up just before sunset if possible, for a couple of reasons. A gorgeous sunset shot and also enough light to get yourself dialled in focus wise, without having to use a torch or struggling with Manual Focus in the dark. It can be very useful to get your bearings and to just relax a little with your thoughts, friends, a kindle book or a nice cup of coffee. It’s not all work work work.
I find i do my best thinking when in a beautiful location watching a sunset, and seeing the stars slowly encompass the sky.
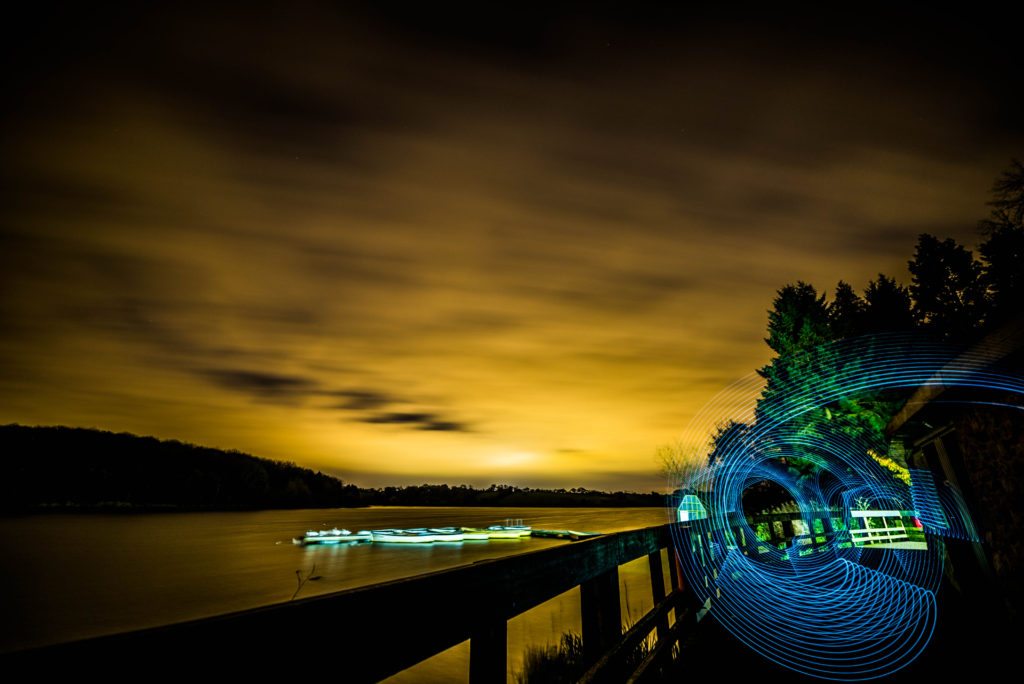
Down at a local reservoir after taking a 4 mile walk round and checking the best places for shooting. Unfortunately the sky clouded over quite a lot so made the best of it, and took out the homemade lightpainting sticks. Also prepared for a possible shoot around this wonderful body of water.
3.Memorise your camera’s layout.
Like a soldier with his rifle, know your camera inside and out, know every button that you will use for night photography blindfold.
Know how to change your ISO, fstop and shutter speed. Know where your preview buttons are. The better you are at this, the easier your shooting will be.
I like to know my ISO without thinking about it. Test shot at 10000ISO to do a quick focus check on a shorter exposure, and then ramping it back down to where you need can take seconds when you know your buttons, but can be minutes of you don’t.
Imagine getting frustrated enough to turn your headtorch on, ruin your night vision just to change a small setting. That has happened a lot over the start of my career, but almost never now.
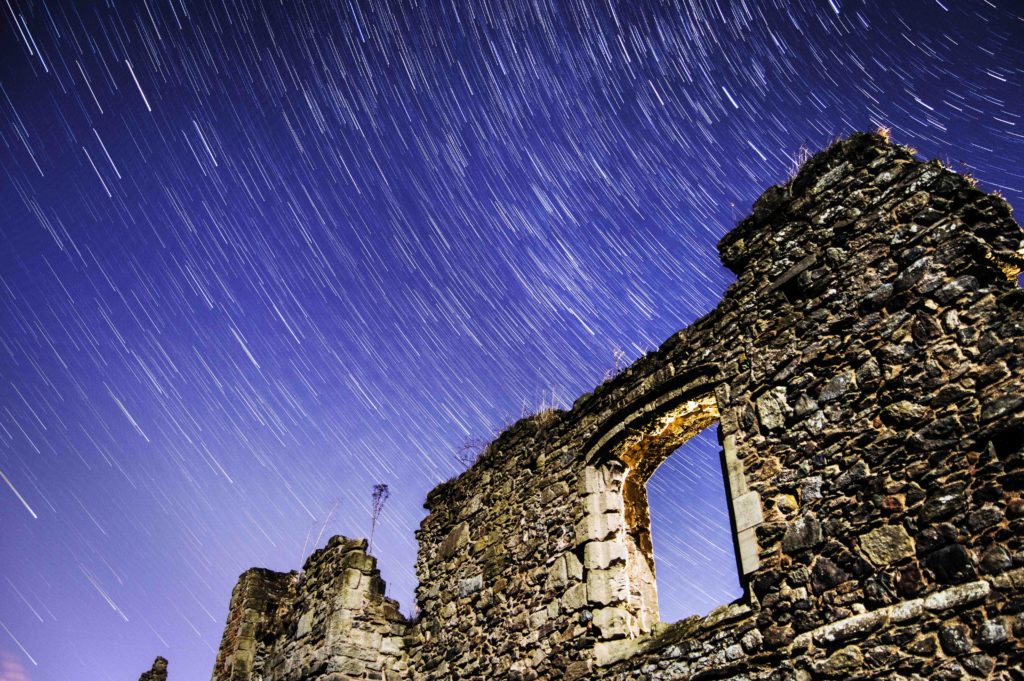
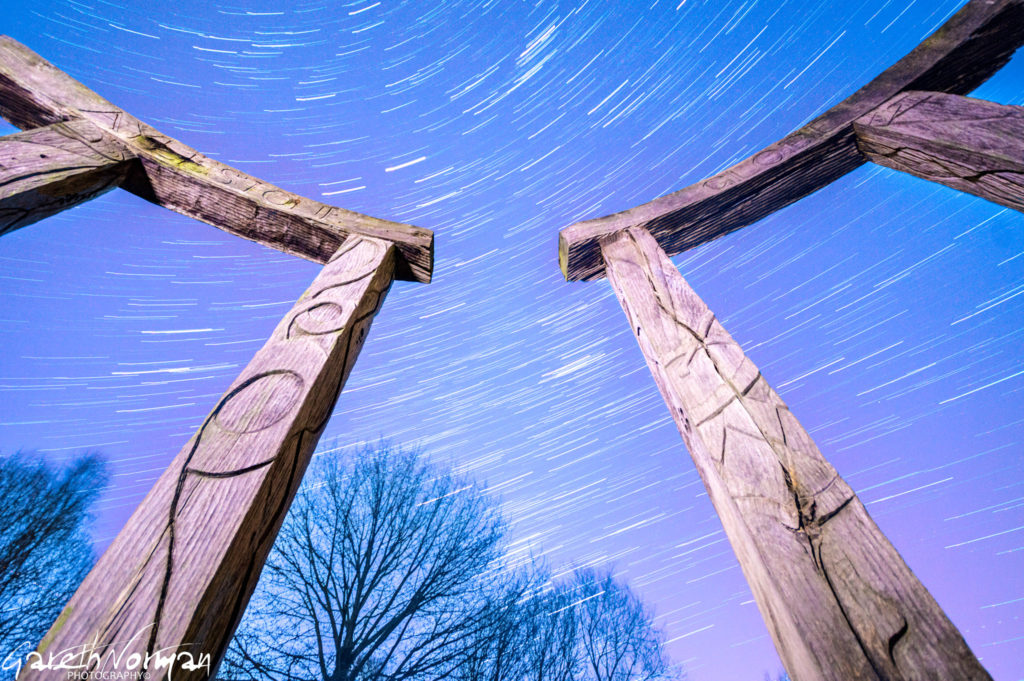
A heavily moonlight night shooting star trails. Just an example of getting the settings right and taking a great long exposure stare trail.
4. Shoot Raw.
Shoot RAW as much as possible.
The main reason being colour cast and contrast. At night there is a huge amount of contrast, shadows and different lighting that can effect a photo. Sometimes good, sometimes, you have to work it a bit. For instance shooting in town and having to deal with the street lighting giving a harsh lighting scenario. If you shoot in RAW you can mitigate that by working with your white balance and looking at your contrast to obtain a more pleasing shot. It gives you more options in the edit.
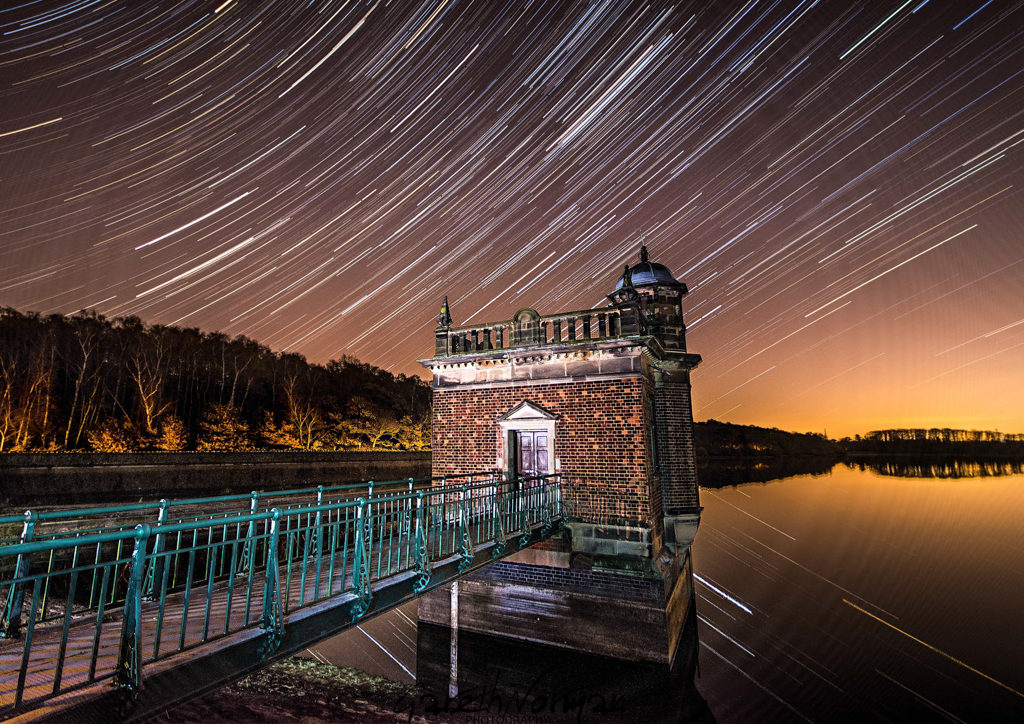
Daylight White Balance for a more natural ambience. Notice the airglow in the distance from the town lighting and the car headlights through the bottom of the treeline. Sometimes things like this can add some great points to your photo. The building was hit with a flash to bring out the detail.
5. Acclimate your gear out and in.
Probably not something that you would really think about, but differences in temperature can cause havoc with your kit.
Get your gear setup and on tripods and leave it for a few minutes before shooting. Take your time getting everything ready until your hardware has acclimated.
When the temperature drops at night, you can have problems. The closer to the Dew Point, the more likely your lens will just fog up. The lower to the ground, the quicker this generally happens as well.
To mitigate this you can use Dew Heaters, if you want to spend a fair wedge of cash. To start out though, just get a couple of hot hands, hand warmers and wrap them round the body of the lens or lens hood. This will raise the surrounding temperature and hopefully stop fogging.
Hot hands are quite a cheap alternative, and also very useful for their intended function. In England, it gets cold. If you need some, click here to order them.
Same for when you get back in. Leave your kit in your bag to slowly acclimate back to room temperature. If you have a porch or somewhere secure to keep your gear, do that.
Really Cold!!!!
6.Carry Extra Batteries
Always, always carry extra batteries. I don’t think i can stress this enough. For a nights shooting i have been through 3 batteries. The cold weather can reduce the batteries efficiency.
Also you get those days when you just forget about the battery in your camera, but if you have 3 more fully charged in your bag, your ready to go. I would suggest this for most photography trips, but especially astro.
The ones i use in my Nikon D750 are available here. Any other make and model, just use the search bar in the link and enter your make and model.
On the way back to Manchester, looking down over Glossop. I had been to the spot i wanted and got interrupted by 2 large caravans of travellers, so decided to move further up the road, to spot number two.
After a good few hours there, and meeting some more togs doing car trails, this was spot 3. I had noticed a small layby on the way in and decided to pull in for this shot of Glossop at around midnight.
7.Get your bum off the Sofa and get out and shoot.
Just get out there. Go in the back garden, start shooting a trail. build your skills. Go out in the countryside for a drive, then maybe a walk with the family to check out a great location. An awesome country park, or an old castle, or even just walk from one village to another over the public footpaths through the fields.
As soon as you have your location, just go at the first opportunity, even if your there for half an hour before the clouds roll in, you’ve been there, and you’ve increased your skills. Get the Torch out and lightpaint a building, make a lightstick or use a childs toy lightsaber to make some interesting shapes.
In all honesty a short walk from my house. No excuses to not shoot the stars if it’s not cloudy. Even just outside the City Centre there are places to get good, fun and interesting shots.
There are always different ways to do something, and this is just my experiences, and these are mine. These things made a huge difference for me, and some of them are just a matter of practice. Some are just to make life much easier for your Astro shooting.
BONUS TIP!!!!!
Take some good coffee with you and of course Dark Chocolate Hobnobs!.
At the moment i am wolfing down some of the most amazing coffee locally roasted in Oakham.
https://twochimpscoffee.com/ The Geek in me, loves the website, and the Astro Shooter in me loves the coffee. My favourite right now is ‘The Tiny Horse’. Nice full bodied coffee.
Support your local businesses if at all possible, especially when they are doing something good.
I now have a store for Prints and anything else. Look at the top of the page and click on Shop. If you want to email me for a custom order, or something not in the shop drop me an email.
Finally, have fun and stay safe, and enjoy shooting.
Any suggestions for future blog posts, drop me an email. I will at some point be going into more detail on future posts.
you can see more of my work at
https://www.instagram.com/garethnormanlandscapes/
https://www.instagram.com/garethnormanportraits/
https://www.facebook.com/garethnormanlandscapes/
https://www.facebook.com/GarethNormanPhotography/
#longexposure #landscapes #garethnormanphotography #leicesterphotographer #hardworkpaysoff #coastline #pushyourlimits #followyourpassions #nikon #tokina #slowshutter #greatbritian #england #madeinengland #explore #exploremore #unlimitedplanet #astrophotography #getoutmore
When I try to focus the f-number changes. Is this normal (I’m new to digital photography)?
Sorry for the late reply. Can you advise what camera and lens you are using? I expect rather than focusing, your changing the focal length of the lens. Some lens work at different fstops, at different focal lengths. Tell me what you are doing, and i will try and help.
AWZItvGE